Why Your Thermal Imager Gives Wrong Readings: A Guide to Emissivity
Update on Nov. 4, 2025, 1:14 p.m.
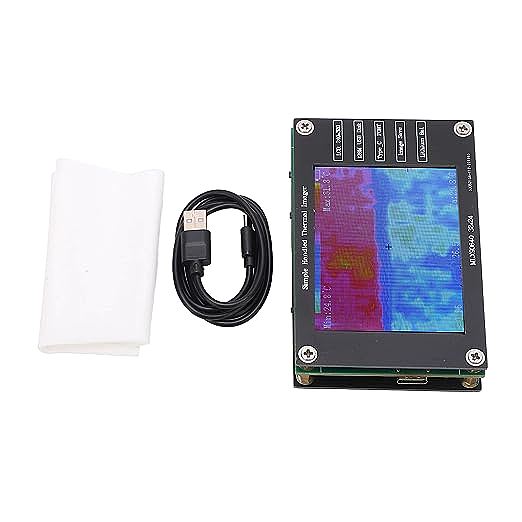
So, you bought a thermal imager. You’ve seen the pros use them to find hotspots in electrical panels, detect insulation leaks, or even pinpoint shorts on a circuit board. You unbox your new tool, something like a UNI-T UTi165A, point it at a metal pipe, and… the reading is completely wrong. It says the pipe is 70°F (21°C), but you know it’s hot.
You’ve just hit the single biggest hurdle in thermal imaging, and I’m here to tell you: your tool isn’t broken. You’re just missing the “secret manual.”
Welcome to the class. As your mentor, I’m going to teach you the one concept that separates frustrated beginners from confident pros. It’s not about pixels or price tags. It’s about a single, crucial setting: emissivity.
Forget what you think a thermal camera does. It is not a thermometer. A thermometer measures temperature by contact. A thermal imager is a light detector. It just happens to see a kind of light that our eyes can’t—infrared, the light of heat itself.
And this is where the trouble starts.
The Most Important Setting You’re Probably Ignoring
Everything in the universe with a temperature above absolute zero “glows” in infrared. But here’s the catch: not everything “glows” with the same efficiency.
This efficiency is called emissivity.
- A high-emissivity object (like wood, rubber, drywall, human skin, or matte black paint) is a great “glow-er.” It radiates its heat energy very effectively. It has an emissivity value close to 1.0.
- A low-emissivity object (like polished copper, aluminum, or stainless steel) is a terrible “glow-er.” It holds onto its heat energy and radiates very little. It has an emissivity value close to 0.1.
Why does this matter? Your thermal camera’s sensor (a grid of tiny detectors called microbolometers) only sees the energy that reaches it.
When you point your camera at a high-emissivity object, like a person, it sees a strong signal and correctly says, “That’s 98.6°F.”
But when you point it at a low-emissivity object, like a shiny metal pipe, it sees a very weak signal. The camera, not knowing any better, says, “I’m only seeing a little energy, so that must be 70°F.” The camera is telling the truth about the energy it sees, but it’s giving you a false temperature.
Worse, that shiny object acts like a thermal mirror. It reflects the infrared energy of its surroundings into your camera. When you point your imager at a shiny aluminum component, you’re not measuring the component; you’re likely measuring the reflected heat of your own face.

How to Get Accurate Readings (The “Pro” Fix)
This is where that “adjustable emissivity” feature on your device, like the 0.1~0.99 setting on the UTi165A, becomes the most important button on the entire tool.
The default setting on almost every camera is 0.95, which is perfect for most non-metallic surfaces. When you need to measure a shiny surface, you have two options:
- The “Tape” Fix (The Easy Way): Don’t measure the metal. Stick a piece of black, matte electrical tape on it. Wait a minute for the tape to match the object’s temperature. Now, aim your camera at the tape (which has a high emissivity of ~0.95). You will get a dead-on accurate reading of the metal’s temperature.
- The “Adjust” Fix (The Right Way): If you can’t put tape on it, you must tell the camera what it’s looking at. Find a reference chart, look up the emissivity of “polished aluminum” (e.g., ~0.05), and dial that number into your camera’s settings. The camera will now mathematically correct for the weak signal, boosting its calculation to show you the actual temperature.
Mastering this one concept—that you’re measuring a surface’s ability to radiate, not its temperature directly—is the entire game.
Decoding the Rest of the Spec Sheet
Once you understand emissivity, all the other specs just tell you how your camera sees the world. Let’s use the UTi165A as our classroom example.
- IR Resolution (80x60): This is your level of detail. An 80x60 resolution means your camera has a grid of 4,800 total pixels. This is not a high-definition photograph. You will not be reading serial numbers from across the room. The purpose of this resolution is to find anomalies. It’s perfect for scanning an electrical panel to see which breaker is glowing, or scanning a wall to see the outline of a moisture patch. As user reviews for similar products note, it’s great for “fault finding PCB shorts” because the one shorted component will glow like a star against the dark background.
- NETD (≤150mK): This is Thermal Sensitivity. NETD (Noise Equivalent Temperature Difference) is a fancy way of saying “how well the camera can hear a thermal whisper.” A value of 150mK means it can distinguish between two points that are only 0.15°C apart. This is crucial for finding subtle problems, like a faint cool spot on a wall indicating a new, small insulation leak. A lower NETD number is always better, as it gives you a clearer, less “noisy” image.
- Temperature Range (-10°C to 400°C): This is simply what it can measure. A low end of -10°C is great for finding cold drafts, while a high end of 400°C (752°F) is more than enough for checking electrical systems, automotive engines, and most industrial machinery.
- Field of View (FOV: 51°x38°): This is a wide-angle lens. It’s like your phone’s 0.5x camera. It’s fantastic for “taking in the whole scene,” like scanning a large wall or ceiling quickly. The tradeoff is that it’s not “zoomed in,” but for diagnostic work, seeing the context is often more important.

Where Knowledge Becomes Power
Now, let’s put it all together. You are no longer just a person with a gadget; you are a data interpreter.
- You’re checking an electrical panel: You set your emissivity to 0.95 because the breakers are matte plastic. You use the wide FOV to scan the whole panel at once. The 80x60 resolution is perfect for making one breaker pop out visually, and the NETD is sensitive enough to see it’s 5 degrees hotter than the others. You’ve found a problem.
- You’re checking a circuit board: You’re looking for a tiny shorted capacitor. You set the emissivity to 0.95 (for the board’s coating), switch your palette to “Iron” or “Rainbow” for high contrast, and the 80x60 resolution clearly shows one tiny dot glowing white-hot. Job done.
- You’re checking a stainless steel tank: You point and get a reading of 80°F. You know it’s hot. Ah! As a mentor-trained pro, you realize you’re measuring a thermal mirror. You stick a piece of electrical tape on the tank, wait 60 seconds, change your emissivity back to 0.95, and measure the tape. The reading is 185°F. You’ve just uncovered the truth.
That is the power of this technology. It’s not in the tool; it’s in the user. An entry-level imager like the UNI-T UTi165A, when wielded by someone who understands the one crucial concept of emissivity, becomes a powerful and accurate diagnostic instrument. Welcome to the club.


