Seeing the Unseen: How the Ayayu Handheld Thermal Imager Unlocks the World of Infrared
Update on April 14, 2025, 5:59 a.m.
Our eyes are incredible instruments, painting our world with vibrant colors and intricate details. Yet, they show us only a sliver of reality. Beyond the spectrum of visible light lies a hidden dimension, an energetic landscape shaped by something fundamental: heat. Every object around us, from the frosty windowpane to the purring cat, constantly radiates invisible energy, a silent language of temperature. For centuries, this thermal world remained unseen, unfelt from a distance. But what if you could peel back the curtain? What if you could see heat?
Interestingly, the first glimpse into this world came by accident. In 1800, astronomer Sir William Herschel was experimenting with prisms, splitting sunlight to measure the temperature of different colors. He noticed something peculiar: his thermometer registered the highest temperature beyond the red end of the visible spectrum, where there was seemingly no light at all. He had stumbled upon infrared radiation, the very essence of what we perceive as heat, traveling as invisible light waves.
Today, technology allows us to harness Herschel’s discovery. Tools like the Ayayu Handheld Thermal Imager act as our extended senses, translating this invisible infrared energy into images we can understand. They offer a fascinating window into the thermal dynamics constantly unfolding around us. But how exactly do they turn heat into sight?

The Whispers of Warmth: Understanding Infrared Radiation
The science behind thermal imaging starts with a universal truth: everything with a temperature above absolute zero (-273.15°C or -459.67°F) emits infrared radiation. Think of it as an object’s thermal signature, its way of broadcasting its internal energy state. The hotter the object, the more intensely it radiates this “heat light.” This isn’t some mystical force; it’s fundamental physics, elegantly described (in more complex terms) by principles like the Stefan-Boltzmann law, which links an object’s temperature to the amount of energy it radiates.
Unlike a regular camera that captures reflected visible light, a thermal imager is designed to detect these infrared emissions. This ability enables non-contact temperature measurement. You don’t need to touch a potentially dangerously hot pipe or a freezing surface to know its temperature; the imager can sense it from a safe distance, simply by collecting the infrared energy traveling through the air.

The Technological Eye: How Thermal Imagers “See” Heat
At the heart of a thermal imager like the Ayayu model lies a sophisticated sensor, often a Focal Plane Array (FPA) made of microbolometers. Imagine an incredibly sensitive grid, almost like a checkerboard composed of thousands of tiny, individual thermometers. Each “square” in this grid absorbs incoming infrared radiation, heats up slightly, and changes its electrical resistance. The camera’s processor detects these minute changes across the entire grid, measuring the intensity of infrared energy hitting each point.
This raw data, a map of temperature differences, is then processed and translated into a visual image called a thermogram. The camera assigns different colors or shades of gray to different temperature values, creating the heat map we see on the display. This allows us to instantly visualize the thermal landscape – spotting hot spots, cold zones, and subtle temperature patterns that would otherwise remain completely invisible.

The Ayayu Imager: A Tangible Window to the Infrared
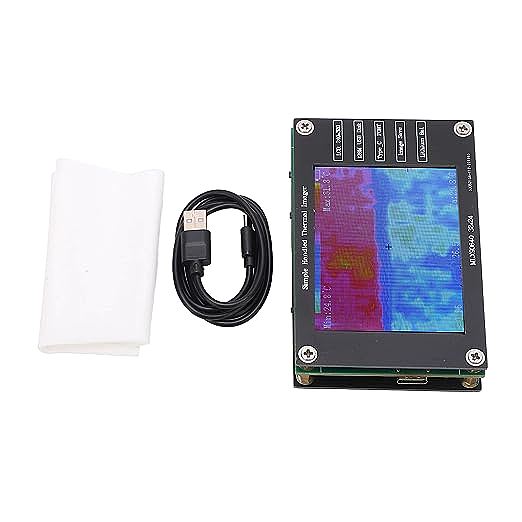
The Ayayu Handheld Thermal Imager brings this fascinating technology into an accessible, easy-to-use format, serving as a practical tool to explore these scientific principles. Let’s look at its key specifications, not just as numbers, but through the lens of what they mean for seeing the thermal world:
-
Temperature Range (-40°C to 300°C / -104°F to 572°F): This broad range covers a vast spectrum of everyday phenomena. It allows you to visualize the chill of a freezer, the warmth of electronics, the heat of plumbing pipes, or even check if your grill is evenly heated. It encompasses many common temperatures encountered in home diagnostics and hobbyist applications.
-
Accuracy (±2°C) and the Big Caveat: Emissivity: The imager aims for an accuracy of plus or minus two degrees Celsius under ideal conditions. However, “ideal conditions” in thermography heavily depend on a crucial property of materials called emissivity. Emissivity (ranging from 0 to 1) describes how effectively a surface radiates thermal energy compared to a perfect blackbody (which has an emissivity of 1). Think of it as the surface’s “willingness” to emit its heat as infrared radiation.
- Dull, non-reflective surfaces (like wood, drywall, rubber, skin) generally have high emissivity (often around 0.95) and radiate heat efficiently, making them easy to measure accurately.
- Shiny, reflective surfaces (like polished metal, aluminum foil) have low emissivity (can be below 0.1). They are poor radiators and tend to reflect the infrared radiation from their surroundings, much like a mirror reflects visible light. Trying to measure the temperature of shiny metal directly with default settings will often give you a wildly inaccurate reading – you might be measuring the reflection of your own body heat!
- While the Ayayu might not allow direct emissivity adjustment (common in basic models), understanding this concept is vital. Knowing that shiny surfaces are tricky helps interpret the images correctly. For more critical measurements on such surfaces, experienced users sometimes apply high-emissivity tape or paint to the area of interest. For basic tasks with the Ayayu, focus on non-reflective surfaces for more reliable readings.
-
Decoding the “Thermal Mosaic”: Sensor Resolution (24x32 Pixels): This is arguably the most critical specification to understand, and where managing expectations is crucial. The Ayayu’s sensor has a resolution of 24 pixels horizontally by 32 pixels vertically. This means it captures a total of 768 individual thermal data points to create the image.
- What does this look like? Imagine trying to recreate a detailed photograph using only 768 Lego bricks, or viewing a picture from a very early, low-resolution digital camera. You can make out large shapes, broad areas of color (temperature), and general patterns, but fine details are completely lost. You’ll see a mosaic or a blocky representation of the heat scene.
- Sensor vs. Display: It’s important not to confuse the sensor resolution (24x32) with the LCD display resolution (240x320). The larger display simply stretches or interpolates (smooths) the limited 768 data points to fill the screen. It’s like using a magnifying glass on that Lego picture – the image gets bigger, but no new detail magically appears. The fundamental detail is limited by the sensor’s 768 pixels.
- The Takeaway: With a 24x32 sensor, you can effectively spot large temperature differences, like a poorly insulated section of a wall, a drafty window frame, or whether a whole radiator is hot or cold. You will not be able to see the intricate heat signature of small electronic components, pinpoint tiny leaks, or resolve fine thermal patterns. Set your expectations accordingly: think broad strokes, not fine lines.
-
Refresh Rate (8Hz): The Frame Rate of Heat: The image updates 8 times per second (8 Hertz). This is generally adequate for observing static scenes or slowly changing temperatures. However, if you pan the camera quickly or try to observe a rapidly heating or cooling object, the image might appear slightly choppy or laggy, like watching a low-frame-rate video.
-
On-Screen Information (Max/Min/Center): The display conveniently shows the temperature at the center crosshair, as well as automatically tracking the hottest and coldest points currently within the imager’s view. These are helpful tools for quickly identifying areas of interest within the broader thermal scene.
-
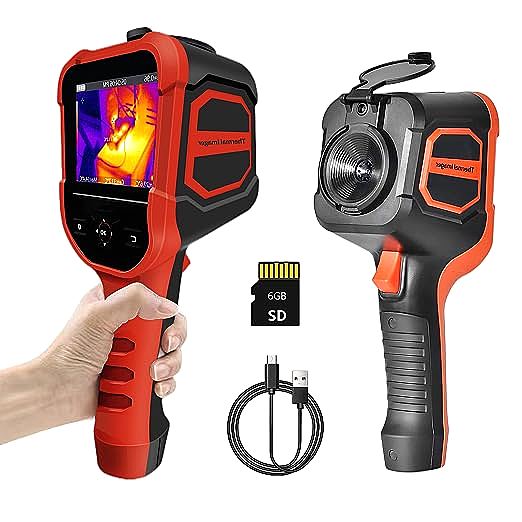
Capturing the Moment (Image Storage): The ability to store up to 100 thermal images directly on the device (using its built-in SPI flash memory) is useful for documenting findings or comparing readings over time. Images can be transferred to a computer via a USB connection.
Exploring Your Thermal Neighborhood: Basic Tasks for the Ayayu
Given its capabilities and limitations (especially the resolution), the Ayayu imager is best suited for introductory exploration and basic diagnostic tasks around the home or for hobbies:
- Energy Sleuthing (Broad Strokes): Spot significant areas of heat loss or gain. Is there a large cold patch on the ceiling indicating missing insulation? Is the entire area around a window frame noticeably colder in winter? Is warm air clearly leaking from around an attic hatch? The 24x32 resolution is sufficient for these large-scale observations.
- HVAC Checks (Basic): Quickly verify if air conditioning vents are blowing cold air or heating vents are blowing warm air across their general area.
- Plumbing & Radiator Checks: See if hot water is flowing through pipes (they will appear significantly warmer) or if a radiator is heating up somewhat evenly across its surface (major cold spots might indicate trapped air).
- Appliance & Electrical (Obvious Issues): Check for significant overheating on appliance surfaces, power bricks, or electrical panels (looking for breakers or connections that are clearly much hotter than others). Again, this is for spotting obvious anomalies, not subtle issues.
- Pet Husbandry: Get a general sense of the temperature gradient in a reptile enclosure.
What it’s not suited for: Diagnosing complex electronic circuit boards, finding tiny air or water leaks, precise temperature measurements requiring high accuracy and emissivity control, or any task demanding fine thermal detail.
Becoming a Savvier Heat Detective: Tips for Better Thermography
Using a thermal imager effectively involves more than just pointing and shooting. Keep these points in mind:
- Emissivity Matters Most: Always consider the surface you’re looking at. Readings from dull, non-reflective surfaces are generally more reliable with basic imagers. Be skeptical of temperatures measured on shiny objects.
- Beware of Reflections: Just like visible light, infrared radiation reflects. A warm reading on a cool, shiny surface might just be the reflection of a nearby heat source (like your own body). Try viewing the surface from different angles.
- Surface Temperature Only: Thermal imagers measure the temperature of the object’s surface. They cannot see through walls, glass (which blocks most thermal infrared), or deep inside solid objects.
- Give it Time: Sometimes, you need to allow temperatures to stabilize or differences to become more apparent (e.g., running the heating for a while before checking for insulation issues).
A Doorway to Thermal Understanding
The Ayayu Handheld Thermal Imager, with its straightforward operation and accessible price point, serves as an intriguing entry point into the world of infrared thermography. It’s less about being a high-performance diagnostic powerhouse and more about being a learning tool – a device that allows you to literally see the invisible energy flows that shape our environment.
By understanding its core function, appreciating the science of infrared radiation, and, crucially, recognizing the implications of its 24x32 resolution, you can use it effectively for basic thermal exploration. It’s a chance to satisfy curiosity, perform simple checks around the home, and gain a newfound appreciation for the constant, silent dance of heat. While more advanced thermal imagers offer vastly greater detail and analytical capabilities for professional use, the Ayayu provides a valuable first step, opening a doorway to understanding the thermal world, one pixelated heat map at a time.